How to make sure your new pendant bail fits your chain

Why This Step Is So Important:
Using your own chain for a custom pendant is a wonderful way for you to keep something you already wear and love, while transforming it into something entirely new and meaningful.
But there’s one detail that determines whether the final piece fits perfectly or causes frustration later: chain measurement accuracy.
A custom pendant doesn’t just “sit” on a chain, it must pass through a precisely sized bail (the loop that connects the pendant to the chain). If the bail is too tight, the pendant won’t fit. If it’s too loose, it may shift awkwardly or sit incorrectly.
That’s why measuring your chain correctly is part of the design process. A simple photo done right ensures your pendant is crafted to fit seamlessly, move naturally, and sit beautifully on your existing chain.
This guide walks you through exactly how to measure your chain at home in a few simple steps.
Step 1: Lay Your Chain Flat (Correct Setup)
A chain laid flat on an inch / millimeter ruler allows for accurate measurement.
- Place a ruler on a completely flat and clean surface.
- Place the chain flat on top of the ruler with no twisting or overlapping links
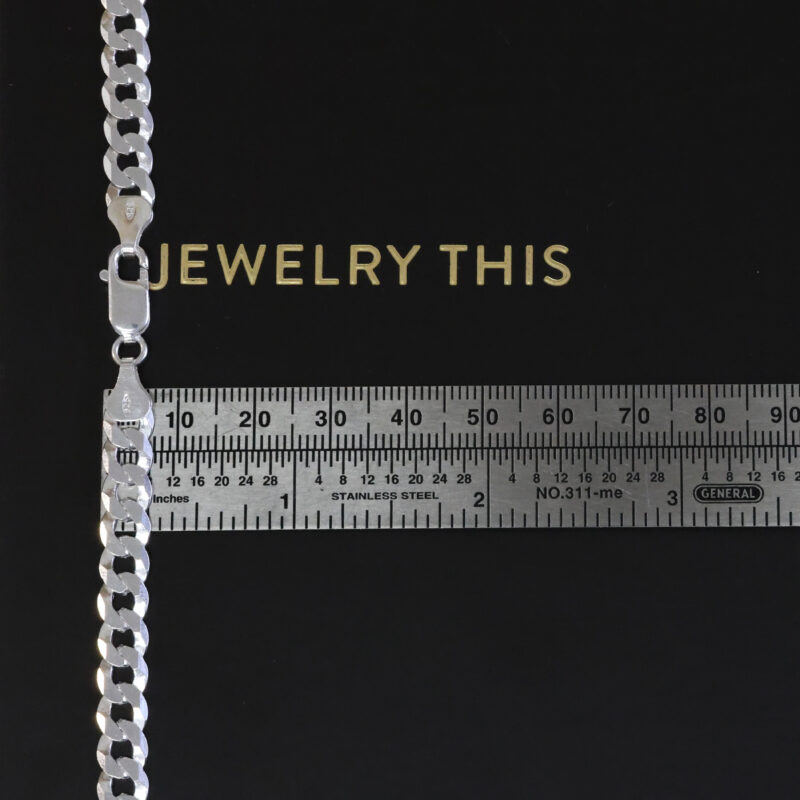
Chain Setup Example
Why this matters: A flat chain ensures accurate measurement and prevents distortion when photographing.
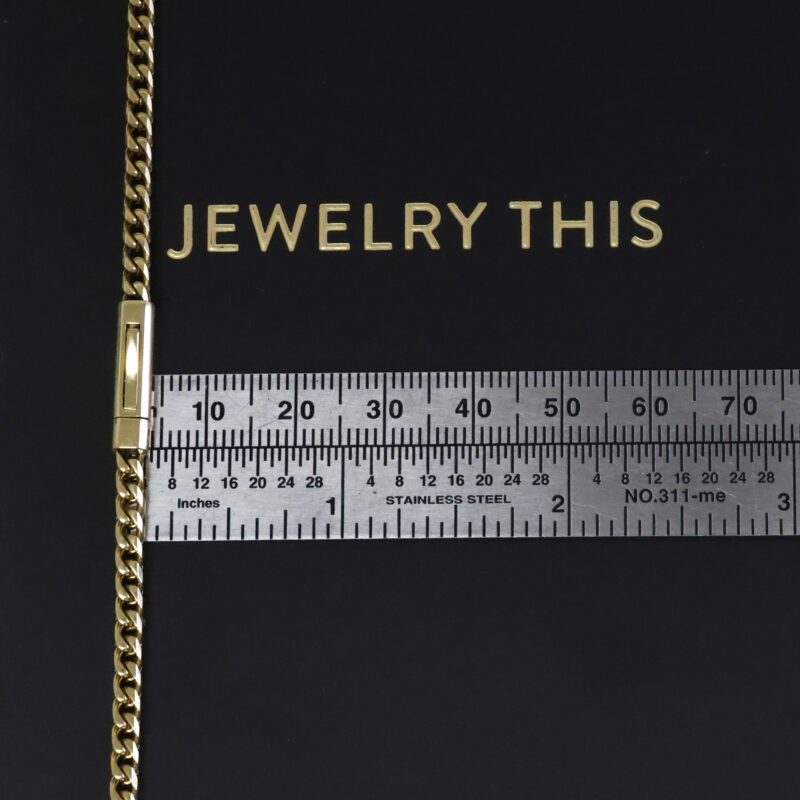
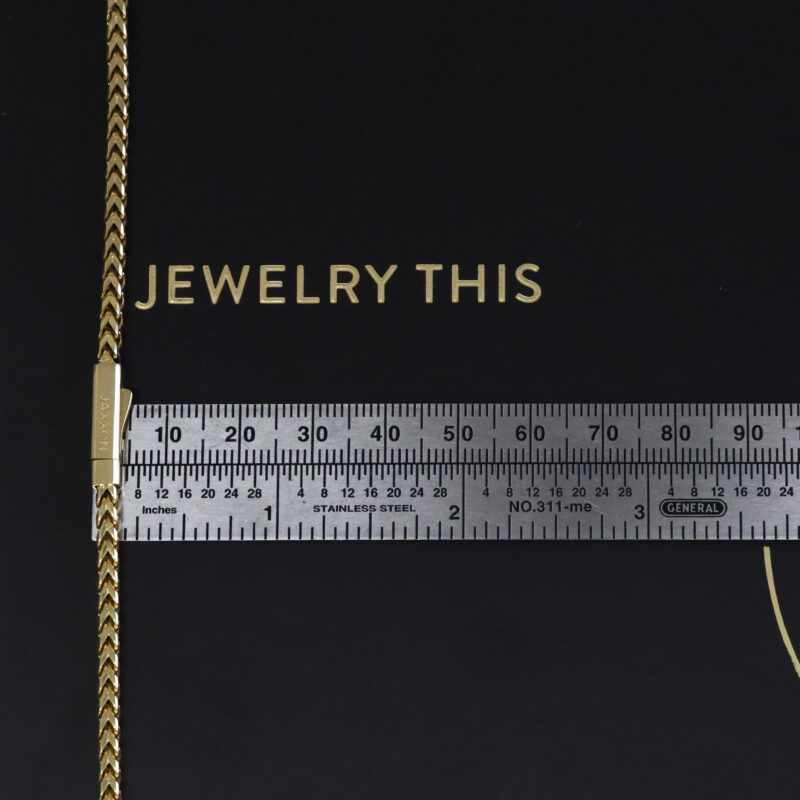
Step 2: Measure Using a Ruler (inches preferred)
Always align the chain with an inch mark for accurate measuring
- Chain aligned at an inch mark on a ruler
- Thickest part of the chain positioned at the starting point.
- Inch markings on the ruler clearly visible in the frame.
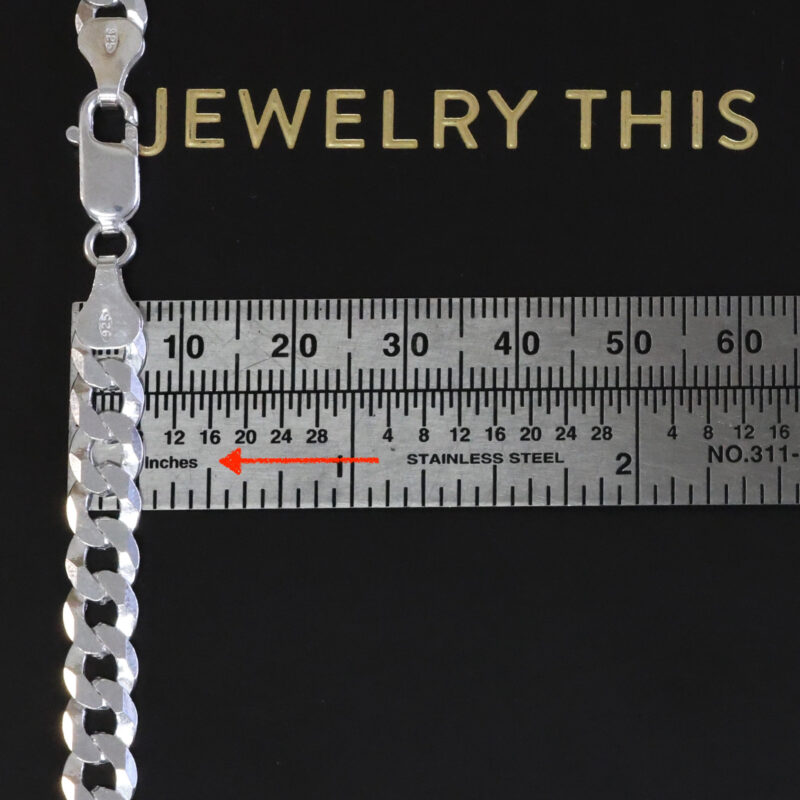
Aligning Chain at a inch mark
Key point: You are measuring the widest thickness, not the length of the chain.
Step 3: Always Include the Clasp
Measure the chain clasp ( or link if it is wider) at widest / thickest point that the pendant bail needs to clear past.
- Close-up of chain clasp
- Showing the clasp as widest section
- Show all sides of the clasp
- Show a comparison between chain links and clasp thickness
Always include the clasp
Clasp measured as Thickest Point
Why this is critical: The clasp is often thicker than the chain itself. If it’s not included, the chain may not fit at all through the pendant bai.
Step 4: Take a Direct Overhead Photo
Proper overhead chain measurement photo versus incorrect angled view
- Left side: incorrect angled shot (distorted perspective)
- Right side: correct overhead shot (flat, clear, aligned)
- Ruler visible in correct example

Correct vs Incorrect Angle Comparison
Important rule: Always shoot directly from above. Angled photos distort scale and lead to incorrect bail sizing.
Step 5: Send Your Photo for Custom Bail Design
Once you’ve taken your photo, send it to us. We use it to determine the exact thickness of your chain and design a custom-fitted bail that:
- Slides smoothly over your chain
- Fits over the clasp without forcing
- Keeps the pendant centered and balanced
- Matches the proportions of your design
This ensures your finished piece feels intentional, not adapted or forced.
Photo Checklist: What to Send Us
To ensure your custom pendant fits your chain perfectly, please send the following photos:
- 1x photo of your chain at the thickest part (this can be a side view, make sure the ruler is visible)
- 1x photo of your clasp (close-up, clearly showing its full thickness)
Recap Video
What Happens After You Send Your Measurement
Once we receive your photo:
- We identify the chain’s true maximum thickness
- We calculate the correct inner bail opening
- We design your pendant to match your chain precisely
- We test proportions for smooth movement and wearability
This step ensures the pendant doesn’t just look right, it functions perfectly on your chain.
Common Mistakes to Avoid
Even small errors can affect how your pendant fits:
- Forgetting to include the clasp
- Taking angled or side photos
- Using a soft measuring tape instead of a ruler
- Measuring a twisted or curved chain
- Guessing instead of photographing actual measurements
Accuracy here prevents redesigns which could come at an additional cost and ensures a perfect final fit.
FAQ Chain Measurement for Custom Pendants
Can I use a tape measure instead of a ruler?
A millimeter ruler is strongly recommended. Flexible tape measures can bend and create inaccurate readings.
What if I don’t have a ruler?
If you don’t have a ruler, please send us a photo of your chain and lock next to a U.S. quarter. While it won’t be 100% accurate, we can usually estimate the chain width based on that comparison.
What happens if I don’t include the clasp in my measurement?
The pendant may not fit over your chain, or the bail may need to be remade. The clasp is essential for accurate sizing.
How close does the measurement need to be?
Very precise. Even small differences in millimeters can affect whether the pendant slides smoothly or feels too tight.
Why do I need to take a photo instead of just telling the size?
A photo allows exact visual confirmation of both thickness and proportions, reducing the chance of error and ensuring a perfect custom fit.
Will my pendant move freely on the chain?
Yes, when measured correctly, the bail is designed to allow smooth movement while staying secure.