8 Mistakes to Avoid When Designing a 3D Jewelry Model for Printing

The growing trend toward using CAD for creating jewelry has brought the art of jewelry design to whole new levels of beauty and complexity, and 3D printing technology has made it possible to bring these designs to fruition. Nonetheless, to actually achieve beautiful, printable jewelry models, there are several mistakes that are especially important to avoid. We’ve created a list of them below so that you know what they are and so designers can use it as a checklist when creating their own beautiful CAD models.
1. Saving the STL file with too low resolution
You should keep in mind that if the resolution is low, the file size will be smaller (more easily transferred via the Internet). However, the triangles in the STL file will be big and cause a ‘pixelated’ print, i.e., the surface of the print will not be smooth. Furthermore, increased triangulation makes the surface of the model rougher, causing significant loss of precious metal in the cleaning process.

Example of low resolution STL file
2. Not enough release holes for hollow models
When designing hollow models, make sure to include enough release holes. Ideally, this means you should include at least three. The size of the holes will depend on the design and the size of the model, but the minimum size should be at least 1.5 mm.
3. Missing support
When designing a ring, make sure to include wiring to hold the base and the top of the ring together, so that the top of the ring is not without support. If the support is missing, it will appear as if the top part of the ring is just floating in the air.
4. Parts not Booleaned together
Parts should not be separate – they should be Booleaned together. This is a central functionality of CAD. If a model is not properly Booleaned together, it will not be watertight, or free of leaks. The printing process requires one object, and in most cases, will reject a model that is made out of separate parts. While some newer printers have solved this problem and are able to take the un-booleaned models, the majority of the high-quality printers do not permit models that have not been booleaned.
5. Forgetting to remove the rail lines
Modelers often forget to remove the rail lines that they used to help them build the model. However, it is important to remove them, as they can obstruct the printing process if they are left behind. In fact, it is important to make sure there are no invisible parts left in the model.
6. Head prongs are too short
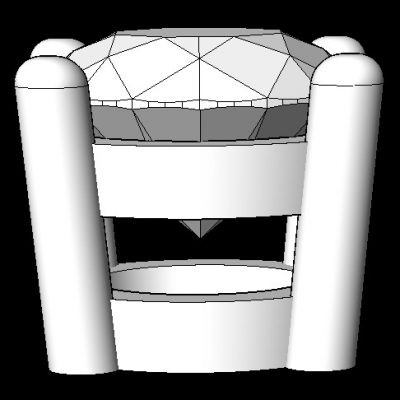
If the head prongs are too short, it will be difficult to set up the center stone. As a rule of thumb, for stones that are larger than 3mm, the prongs should be at least 1.5mm above the girdle of the stone. Smaller stones do not need prongs that tall. On the other hand, many modelers use prongs that are too long, especially in the channels with smaller stones. As a rule of thumb, the height of the prong in the channels should be at the level of stone tables.

Examples of head prongs that are too short.
7. Avoid sharp angles
Try to avoid sharp angle as best you can, but if the design demands it, make sure to soften the sharpest part of the angle by filling it up with fillets.
8. Areas that are impossible to reach with polishing brushes
Any area that is impossible to reach with polishing brushes should be avoided by making the model in parts. Unfortunately, many modelers do not do not fully understand the jewelry production process and frequently commit this mistake by creating the model as one part. Remember: It’s not just about how nice the 3D model looks on the screen of your computer. It’s also about how nice the jewelry piece will look in reality.


